Writing a custom Slash command for Slack
25 Mar 2016I am logged into Slack all day and love most of its features, especially the slash commands. I use the Poncho slash command when I step out from work for lunch, or when leaving home. So, I decided to write a slash command of my own for Slack which takes in a zip code and spits out the weather conditions for that location.
What’s a Slash command?
Messages that start with a slash. The message from the slash command is sent to a configured external URL via HTTP POST. It looks something like,
/CommandName Message
Some examples of built-in slash commands are
-
/giphy : it posts a random gif to a channel

-
/who: lists user in the current channel or group

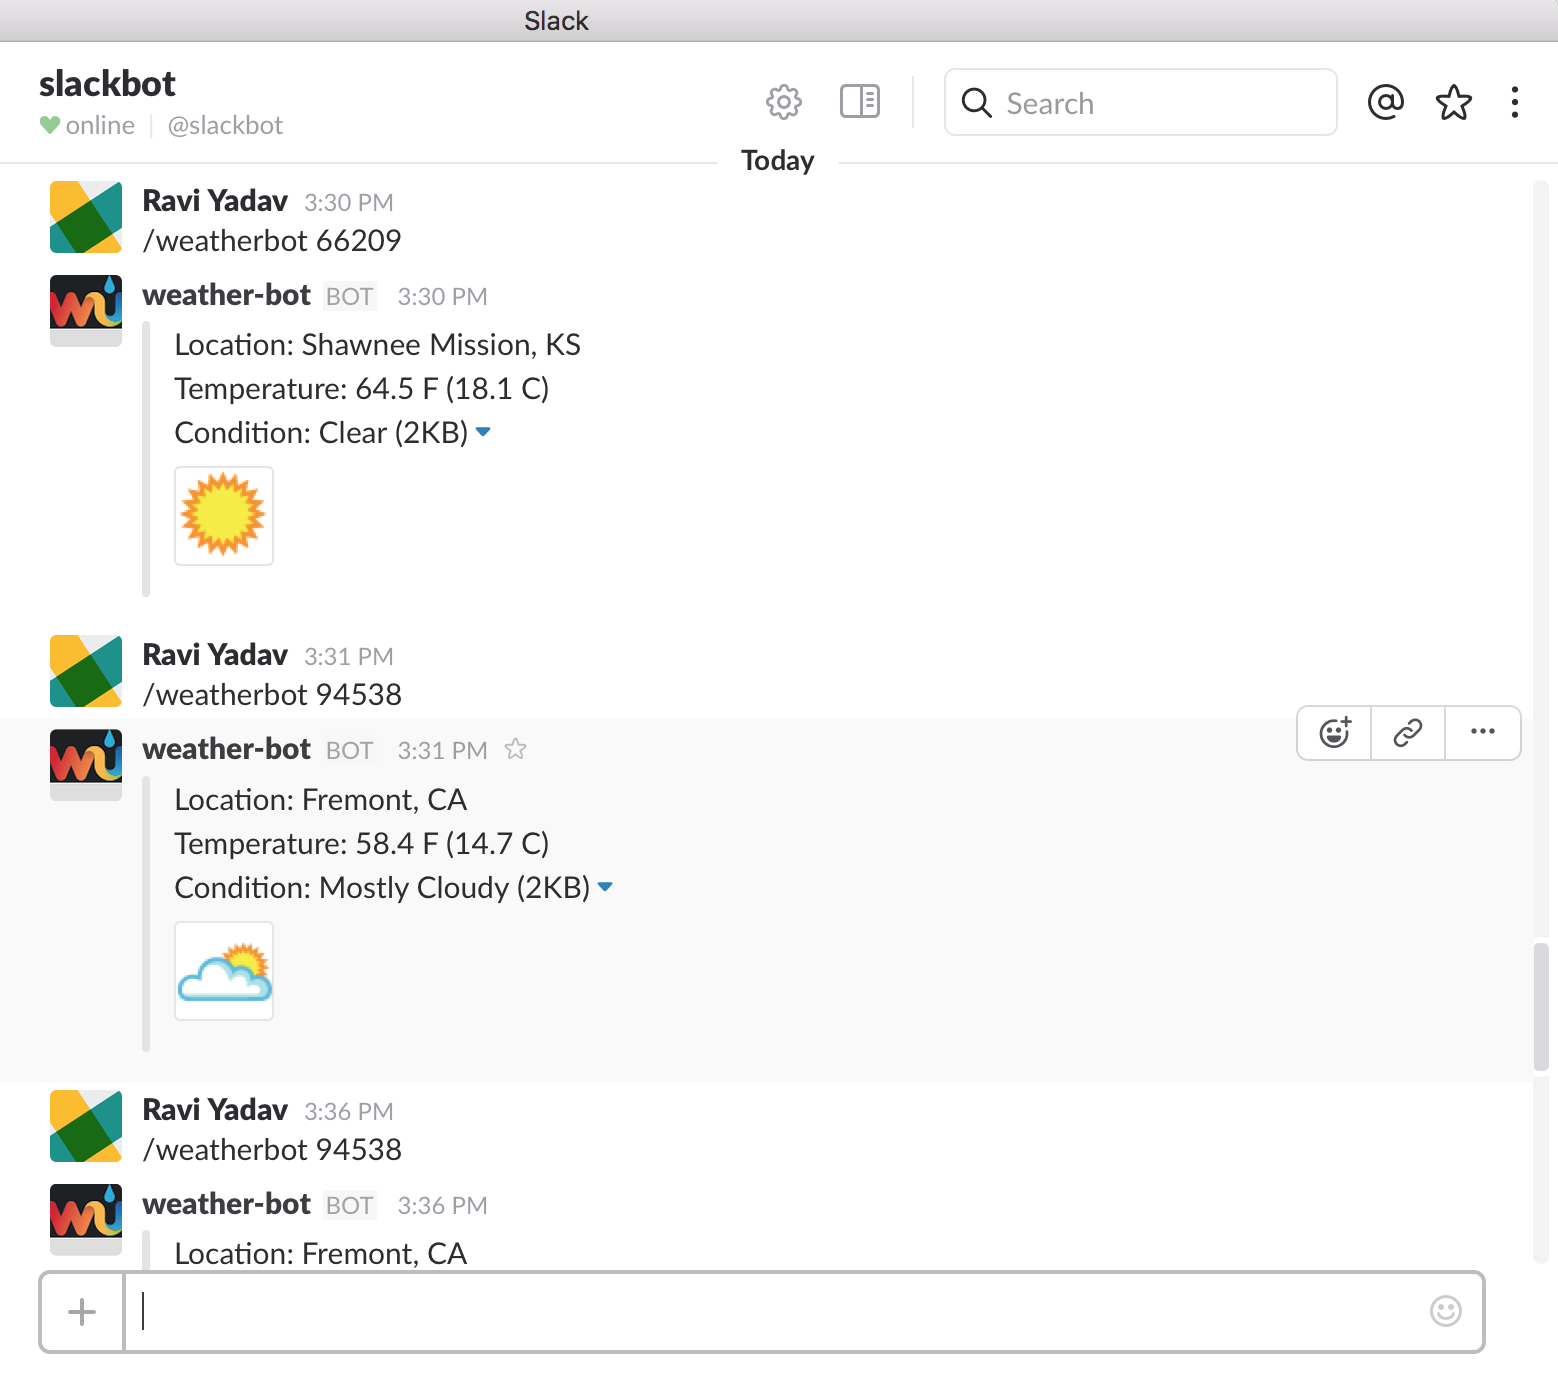
The WeatherBot
We are going to build ‘WeatherBot’ which takes in a zip code and displays the conditions for that location.
Prerequisites
- Create an account on Heroku.
- Create a developer API key on Weather Underground.
- Make sure you have Node and Git installed. You can use Homebrew to install them.
brew install node gitCreate a new directory named weather-slackbot with these files,
touch Procfile
touch package.json
touch index.js
Procfile
A Procfile is a mechanism for declaring what commands are run by your application’s dynos on the Heroku platform. Add the following line to it. Heroku looks for index.js to start the app.
web: node index.jspackage.json
A package.json file contains meta data about your app or module. Most importantly, it includes the list of dependencies to install from npm when running npm install.
Add these lines to the json file:
{
 “name”: “slack-weather”,
 “version”: “1.0.0”,
 “description”: “_A Slackbot that gets weather conditions”,
 “main”: “index.js”,
 “dependencies”: {
   “body-parser”: “^1.14.2”,
   “ejs”: “2.3.3”,
   “express”: “4.13.3”,
   “request”: “^2.67.0”
  },
 “devDependencies”: {},
 “scripts”: {
   “test”: “echo \”Error: no test specified\” && exit 1"
 },
 “repository”: {
   “type”: “git”,
   “url”: “git+https://github.com/ryadav88/slack-weather.git"
 },
 “author”: “”,
 “license”: “MIT”,
 “bugs”: {
   “url”: “https://github.com/ryadav88/slack-weather/issues"
 },
 “homepage”: “https://github.com/ryadav88/slack-weather#readme"
}
index.js
var express = require('express');
var app = express();
var url = require('url');
var request = require('request');

var format = ".json";
var apikey = process.env.WU_ACCESS  //WU API key; will be set in Heroku

var bodyParser = require('body-parser');
app.use(bodyParser.json());
app.use(bodyParser.urlencoded({ extended: true }));

//use port is set in the environment variable, or 9001 if it isn’t set.
app.set('port', (process.env.PORT || 9001));

//for testing that the app is running
app.get('/', function(req, res){
  res.send('Running!!');
});

//app.post is triggered when a POST request is sent to the URL ‘/post’
app.post('/post', function(req, res){
  //take a message from Slack slash command
  var query = req.body.text

  var parsed_url = url.format({
    pathname: 'http://api.wunderground.com/api/' + apikey + '/conditions/q/' + req.body.text + format,
  });

  console.log(parsed_url);

  request(parsed_url, function (error, response, body) {
    if (!error && response.statusCode == 200) {
      var data = JSON.parse(body);
      var temperature = data.current_observation.temperature_string;
      var weatherCondition = data.current_observation.weather
      var icon_url = data.current_observation.icon_url
      var location = data.current_observation.display_location.full

      var body = {
        response_type: "in_channel",
        "attachments": [
          {
            "text": "Location: " + location + "\n"
                  + "Temperature: " + temperature + "\n"
                  + "Condition: " + weatherCondition,
            "image_url": icon_url,
          }
        ]
      };
      res.send(body);
    }
  });
});

//tells Node which port to listen on
app.listen(app.get('port'), function() {
  console.log('Node app is running on port', app.get('port'));
});
Installation and running
Once you have the 3 files setup, jump to weather-slackbot folder and install all the dependencies.
npm iAfter npm is finished installing dependencies, run:
node index.jsThe app is running. Visit http://localhost:9001. You should see “Running!!”. It is now listening for requests at port 9001.
Deploying to Heroku
Now we have to deploy this code to Heroku where Slack can send requests. If you haven’t signed up for a Heroku account yet, do it now. Then install the heroku toolbelt, login, create the app, and finally push it. Follow and run these commands:
brew install heroku-toolbelt
heroku login
heroku create
git push heroku master
To check if it is working, type:
heroku openand you see see the “Running!!” message. Now go ahead and add the Weather Underground API key under WU_ACCESS
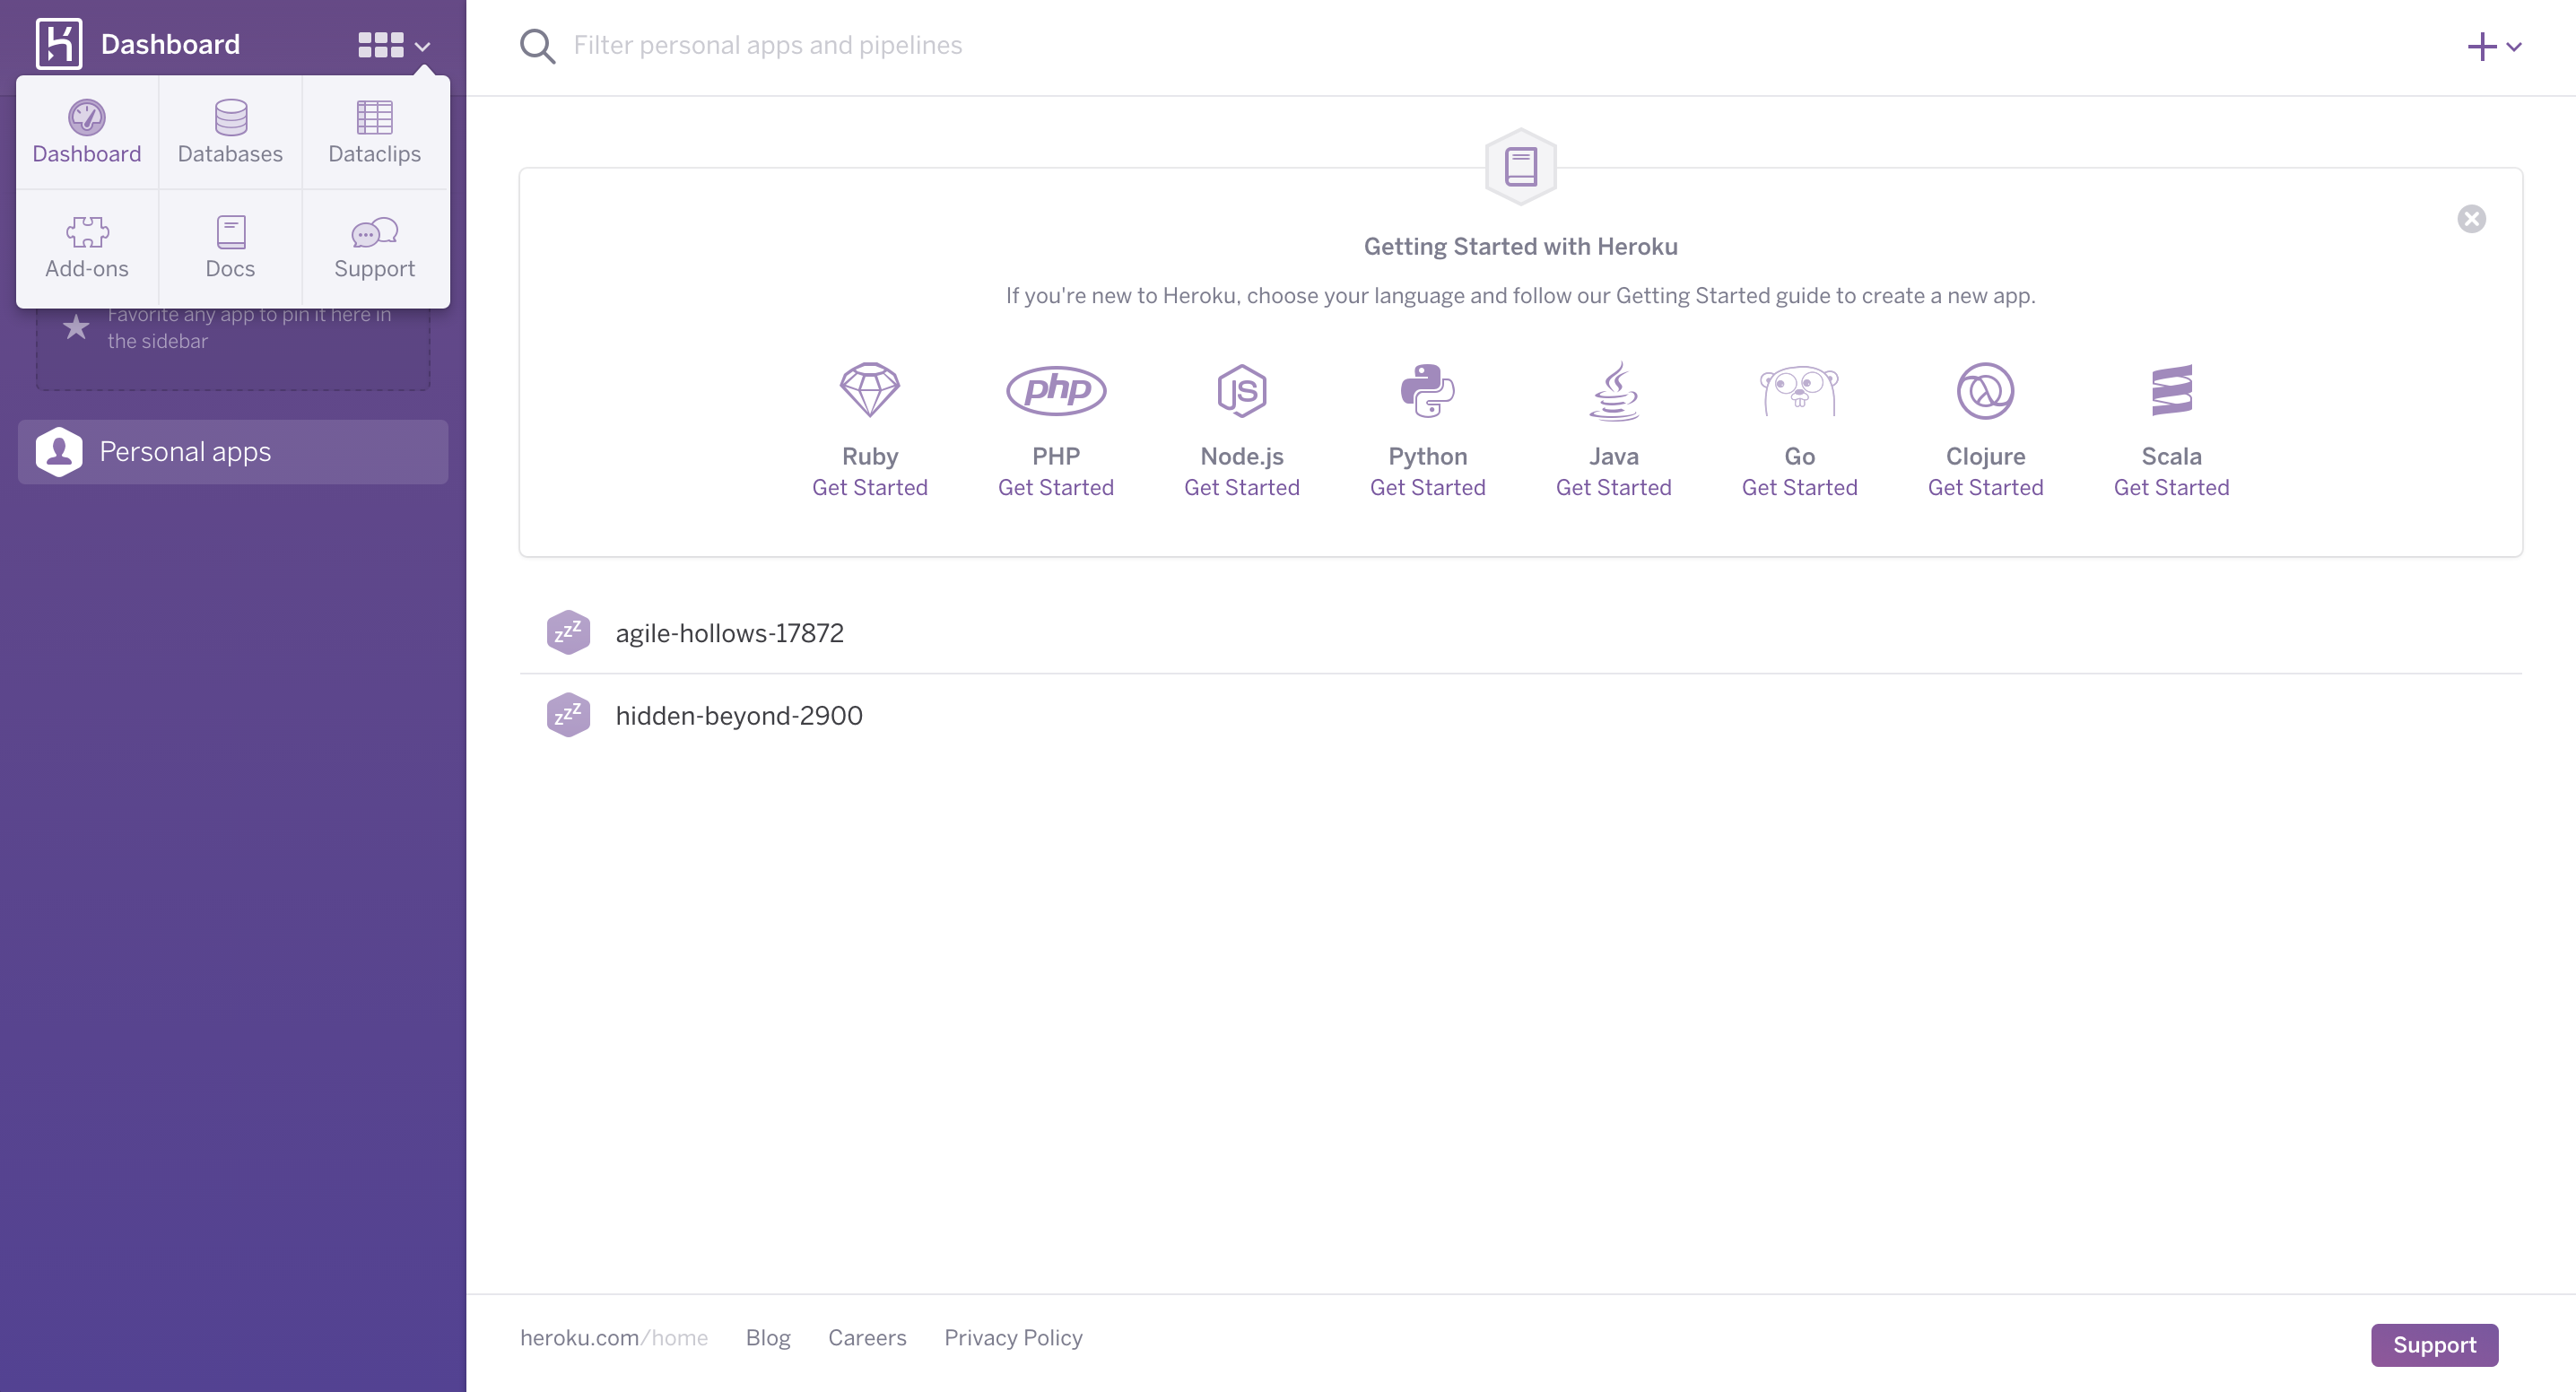
heroku config:add WU_ACCESS=[your API key]Check the Heroku dashboard to see if your app is there.
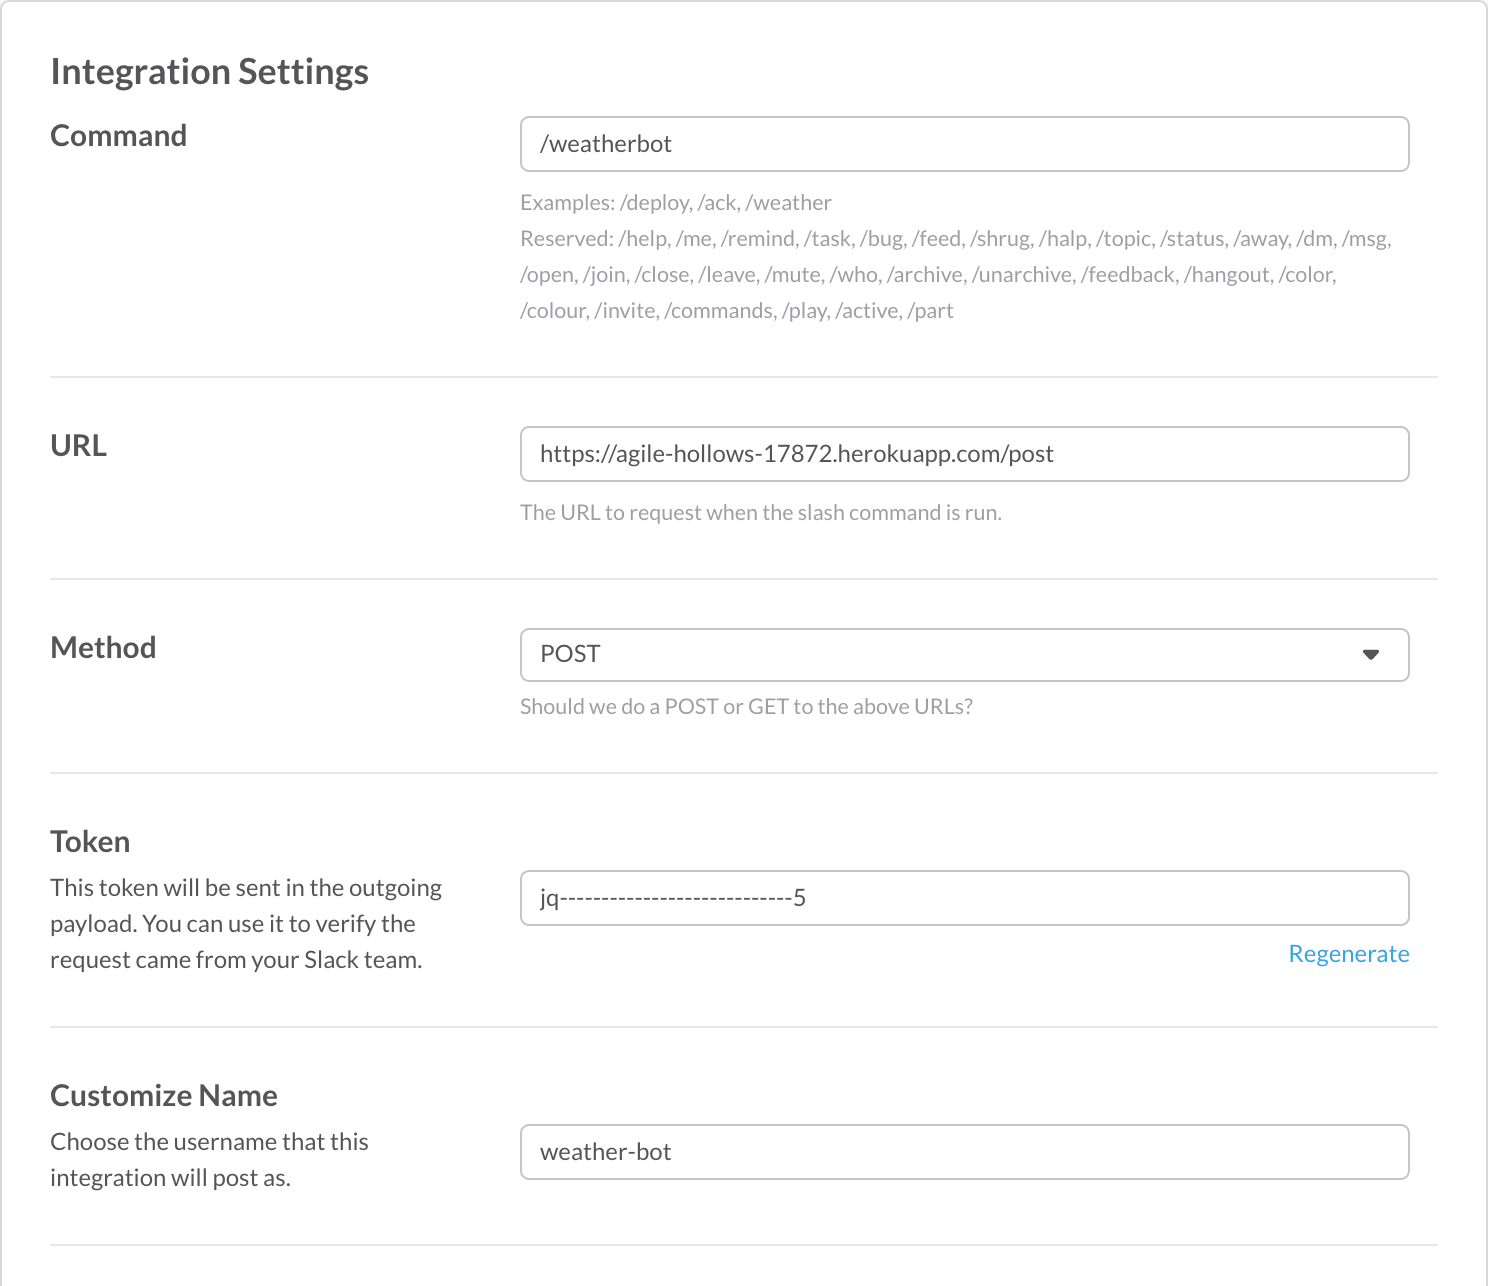
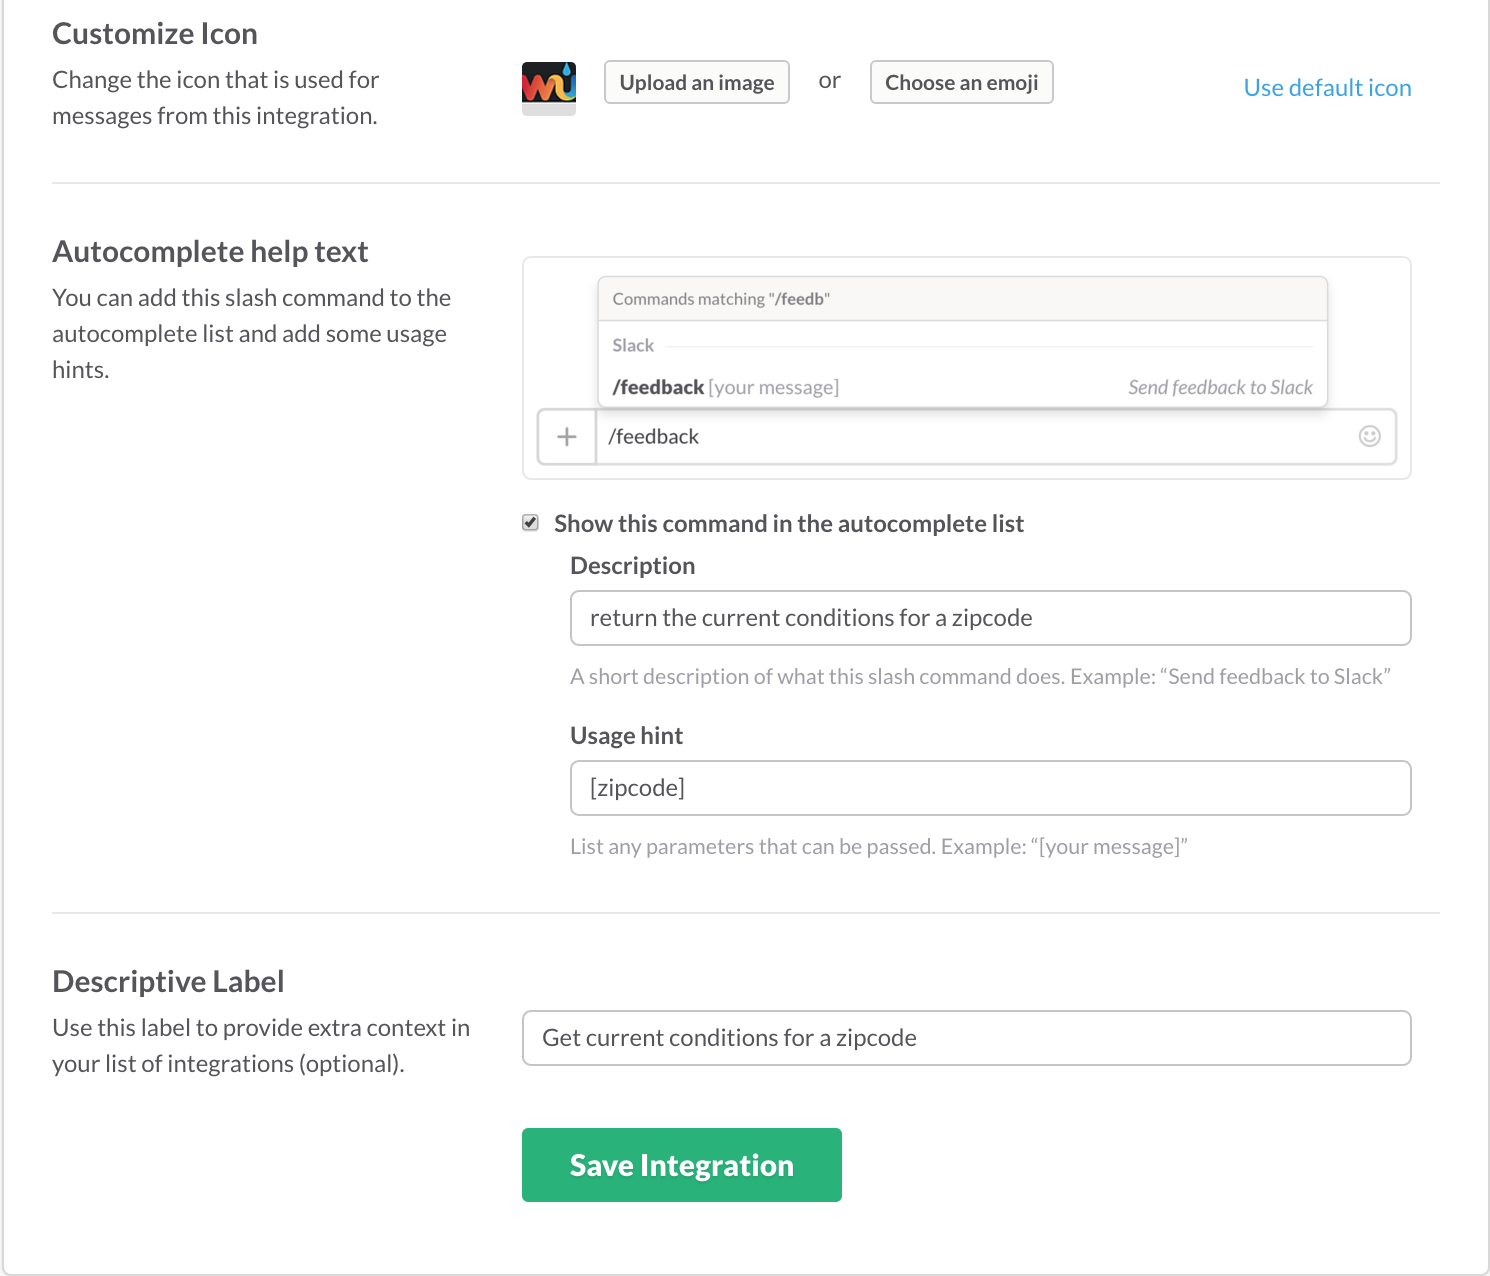
Slack setup
Open slack, go to your team’s custom integration page and add a slash command.
All set! Go ahead and try out WeatherBot.